
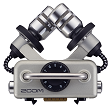
Operation Manual
You must read the Usage and Safety Precautions before use.
©2022 ZOOM CORPORATION
Copying or reprinting this manual in part or in whole without permission is prohibited.
Product names, registered trademarks and company names in this document are the property of their respective companies. All trademarks and registered trademarks in this document are for identification purposes only and are not intended to infringe on the copyrights of their respective owners.
Proper display is not possible on grayscale devices.
The contents of this document and the specifications of the product could be changed without notice.
Windows® is a trademark or registered trademark of Microsoft® Corporation.
iPhone, iPad, iPadOS and Mac are trademarks of Apple Inc.
App Store is a service mark of Apple Inc.
iOS is a trademark or registered trademark of Cisco Systems, Inc. (USA).
Android™ and Google Play are trademarks or registered trademarks of Google LLC.
The microSDXC logo is a trademark.
The Bluetooth® word mark and logo are registered trademarks of Bluetooth SIG, Inc. and these marks are used under license by ZOOM CORPORATION.
The terms HDMI and HDMI High-Definition Multimedia Interface, and the HDMI Logo are trademarks or registered trademarks of HDMI Licensing Administrator, Inc. in the United States and other countries.
Other product names, registered trademarks and company names in this document are the property of their respective companies.
All trademarks and registered trademarks in this document are for identification purposes only and are not intended to infringe on the copyrights of their respective owners.
Recording from copyrighted sources, including CDs, records, tapes, live performances, video works and broadcasts, without permission of the copyright holder for any purpose other than personal use is prohibited by law. ZOOM CORPORATION will not assume any responsibility related to infringements of copyrights.
The illustrations and display screens in this document could differ from the actual product.


The phantom power voltage can be set to +12 V / +24 V / +48 V.(→ Using phantom power)


A dedicated AC adapter (ZOOM AD-17) can also be connected here to use AC power. Connecting this when the power is off will charge the battery.


While the battery is charging, the charging LED will stay lit.
While pressing , raise the mic arm until it reaches the fixed position.

While pressing, lower the mic arm.


To remove a microSD card, push it further into the slot and then pull it out.
Supported recording media
microSDHC: 4 GB – 32 GB
microSDXC: 64 GB – 512 GB
Use a microSD card that is Class 10 or higher.
When recording at 4K resolution, use a microSD card that is UHS Speed Class 3 or higher.
When recording for long periods of time with a microSDHC card, recording files will be split every 4 GB.
When using a microSDXC card, recording to a single file is possible even if the file size exceeds 4 GB.
 .
. .
.After "Goodbye See You !" is displayed, the power turns off.
When Auto Power Off is set to on, the power will be turned off automatically after a certain period of time.
Language setting / date and time setting screens automatically appear when first turned on or when first turned on after being reset.
 and
and  to select the language.
 .
.The language is set and the SET DATE Screen opens.

 to change the date and time.
  .
.The date and time are set and the Recording Screen opens.

If four minutes or more have passed with the battery removed while the power is off, the date and time setting could be reset.
Push a mic capsule into place until it locks.

While pressing the buttons on the left and right sides of the mic, pull it out of the unit.

Do not use too much force when disconnecting. Doing so could damage the mic capsule and the unit.
Recording will stop if a mic capsule is removed during recording.
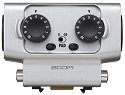
You can connect mics, mixers, and other instruments to Inputs 1 and 2 of the Q8n-4K. The L/R input from the mic capsule and Inputs 1/2 can be used together to record up to 4 channels at the same.


Phantom power (+12 V / +24 V / +48 V) can be supplied to condenser mics.

The button indicators for the selected channel buttons light red and you will be able to monitor the signals input on these channels through the Headphone output.
 and
and at the same time.
To end the stereo link, pressandat the same time again.
Inputs 1/2 support phantom power. They can supply power at +12 V / +24 V / +48 V.
To turn phantom power on, slide to the ON side.

 on the Recording Screen.
The SETTINGS Screen opens.

 on the SETTINGS Screen.
The SYSTEM Screen opens.


Turn .
.

Turn on the right side of the unit.

If an input clips, the button indicator for the channel button will blink. Adjust the level so that the indicator does not blink even when loud sounds are input.
Turn the PAD function on by sliding to the −20dB side to allow connection of mixers and other devices with a rated output level of +4 dB.

 on the Recording/Recording Standby Screen, Webcam Screen, or USB Mic Screen.
 The Mixer Screen opens.
 to set.
On the Mixer Screen, you can set PAN / LEVEL / FX / LOCUT for each channel.

| Button | Explanation |
|---|---|
| Pan the sound to the left. | |
| Pan the sound to the right. | |
| Lower the volume. | |
| Raise the volume. | |
| Set effects. | |
| Reduce noise. | |
 | Change the selected channel. |
| Exit the Mixer Screen. |
The Mixer Screen cannot be displayed during recording / web camera use.
You can reduce the sound of wind, vocal pops and other noise.
on the Mixer Screen to select a channel.

| Setting | Explanation |
|---|---|
| OFF | Low-frequency noise reduction is disabled. |
| 80Hz | Cut audio below 80 Hz. |
| 120Hz | Cut audio below 120 Hz. |
| 160Hz | Cut audio below 160 Hz. |
| 200Hz | Cut audio below 200 Hz. |
| 240Hz | Cut audio below 240 Hz. |
You can record clearer sound by adjusting the volume according to the input signal level.
on the Mixer Screen to select a channel.
| Setting | Explanation |
|---|---|
| OFF | Effects are disabled. |
| Compressor (Comp) | This raises low-level sounds and compresses high-level sound. When recording bands, for example, this can increase the sound pressure, which increases the impact of the audio. |
| Limiter | This keeps the volume below a certain level to prevent the sound from being distorted. |
| Leveler | This automatically adjusts the recording volume to keep it at a certain level when input sound level is low. This is effective when the volume differences are great, such as when an MC speaks between concert performances. |
| De-esser (DeEss) | This makes voices sound better by suppressing sibilants such as "s" sounds in conversations. |
| Noise Gate (Gate) | When the input is below a certain level, this suppresses background noise. |

You can change the recording mode on the Recording Screen.
 on the Recording Screen.
| Setting | Explanation |
|---|---|
| MOV | Record as MOV files containing both video and stereo audio. |
| MOV+WAV | WAV files are saved separately for each channel in addition to MOV files. |
| WAV(STEREO) | Stereo audio is saved as WAV files. |
| WAV(MULTI) | Stereo audio and audio for each channel are separately saved as WAV files. |
| File name | Explanation | Recording mode | |||
|---|---|---|---|---|---|
| MOV | MOV +WAV | WAV (STEREO) | WAV (MULTI) | ||
| ZOOMXXXX.MOV | A MOV file with recorded video and stereo audio | ✓ | ✓ | ||
| ZOOMXXXX.WAV | A stereo WAV file with recorded audio | ✓ | ✓ | ||
| ZOOMXXXX_MIC.WAV | A stereo WAV file with recorded audio from the mic capsule | ✓ | ✓ | ||
| ZOOMXXXX_INPUT1.WAV | A mono WAV file with recorded audio from Input 1 | ✓ | ✓ | ||
| ZOOMXXXX_INPUT2.WAV | A mono WAV file with recorded audio from Input 2 | ✓ | ✓ | ||
| ZOOMXXXX_INPUT12.WAV | A stereo WAV file with recorded audio from stereo-linked Inputs 1/2 | ✓ | ✓ | ||
The WAV file for each channel is a recording of audio that is not affected by the Mixer PAN / LEVEL / FX / LOCUT settings.
 to change the resolution.
| Setting | Resolution | Explanation | File size |
|---|---|---|---|
| 4K | 3840 x 2160 | Use when video quality is the top recording priority. | Large ↕ Small |
| 1080 | 1920 x 1080 | This is suitable for all kinds of video recording. | |
| 720 | 1280 x 720 | This is suitable for long-time recording. |
4K and 60 fps / 50 fps cannot be selected at the same time. Select 4K and 30 fps when giving priority to video quality or select 1080 and 60 fps when giving priority to frame rate.
 to change the frame rate.
| Setting | Frame rate | Explanation |
|---|---|---|
| 60 | 60 fps | This is suitable for recording a fast-moving subject or recording smooth-moving video. |
| 50 | 50 fps | |
| 30 | 30 fps | This is the standard frame rate. |
| 25 | 25 fps | |
| 24 | 24 fps | This is suitable for recording movies and music videos. |
You can change the audio recording format on the Recording Screen.
 on the Recording Screen.
| Setting | Explanation |
|---|---|
| 96kHz/24-bit | The higher the sampling frequency (kHz) and bit rate are set, the better the audio quality will be. |
| 96kHz/16-bit | |
| 48kHz/24-bit | |
| 48kHz/16-bit | |
| 44.1kHz/24-bit | |
| 44.1kHz/16-bit |
When MOV+WAV or WAV (MULTI) is selected for the recording mode, 96 kHz cannot be selected.
You can adjust the video quality on the Recording Screen.
 on the Recording Screen.
| Setting | Explanation |
|---|---|
 WIDE WIDE | This widens the field of view. |
 ・ ・ | ↑ |
 ● ● | Standard |
 ・ ・ | ↓ |
 TELE TELE | This narrows the field of view. |
 on the Recording Screen.
| Setting | Explanation |
|---|---|
| AUTO | Settings change according to the recording conditions. |
| INDOOR | Settings are optimized for indoor recording. |
| OUTDOOR | Settings are optimized for outdoor recording. |
| CONCERT LIGHT | Settings are suitable for concert lighting that is bright and changes drastically. |
| NIGHT | Settings are suitable for night and other dark situations. |
 on the Recording Screen.
| Setting | Explanation |
|---|---|
| HIGH | Bright |
| NORMAL | Standard |
| LOW | Dark |
 on the Recording Screen.
Recording starts.


Pressagain to stop recording.
During recording, only the Field of view (FOV) and the brightness (BRIGHT) settings can be changed.
To change other settings or open the Mixer Screen, stop recording.
You can set the Self Timer on the SYSTEM Screen.
on the Recording Screen.The SETTINGS Screen opens.
on the SETTINGS Screen.The SYSTEM Screen opens.

| Setting | Explanation |
|---|---|
| OFF | Start recording right after pressing. |
| 3 sec | Start recording 3 seconds after pressing. |
| 5 sec | Start recording 5 seconds after pressing. |
| 10 sec | Start recording 10 seconds after pressing. |
By pressing during the countdown, you can start recording immediately.
By pressingduring the countdown, you can interrupt it and cancel the self timer.
 on the Recording Screen.
Playback of the last recorded file or last played file will start.

To stop playback and return to the Recording Screen, press.
Only video and audio files recorded with the Q8n-4K can be played back.

After a certain period of time from the start of playback, icons will automatically disappear from the previous screen. If you want to show them again, press.
The following operations are possible during playback.

| Button | Explanation |
|---|---|
 | Skip 10 seconds forward. Press and hold to search forward. |
 | Skip 10 seconds backward. Press and hold to search backward. |
 | Skip to the next file. |
 | Skip to the previous file. |
| Pause / resume playback. |
When the length of the file to be played back is no more than one minute, pressing / skips one second forward / back one second.
Continuous playback can be set on the Playback Screen.
on the Playback Screen.
| Setting | Explanation |
|---|---|
| After one file completes playing back, it returns to the beginning of the file and playback stops. | |
| After one file completes playing back, it returns to the beginning of the file and repeats playback. | |
| After one file completes playing back, the next file plays back without stopping. The files are played back in the order of recorded time. After the latest file is played back, the first file will be played back continuously. |
When playing a file recorded in MOV+WAV or WAV (MULTI) format, you can change the audio channel for playback on the Playback Screen.

| Setting | Explanation |
|---|---|
 MIXED MIXED | Plays back the audio recorded with MIC, CH1 and CH2 and adjusted by the Mixer. |
 MIC MIC | Plays back the audio recorded with the mic capsule. |
 CH1 CH1 | Plays back the audio recorded with Input 1. |
 CH2 CH2 | Plays back the audio recorded with Input 2. |
 CH1/CH2 CH1/CH2 | Plays back the audio recorded with stereo-linked Inputs 1/2. |
File information can be shown on the Playback Screen.
 on the Playback Screen.

Press any button to return to the Playback Screen.
You can delete files that are playing back or stopped on the Playback Screen.
 on the Playback Screen.
 The Deletion confirmation screen opens
 to delete the file.
To cancel the deletion, press.
Use a USB cable to connect to a computer or iOS/iPadOS device and use the Q8n-4K as a web camera, card reader or USB mic.
on the Recording Screen.The SETTINGS Screen opens.
 .
.The USB Screen opens.
 orto select the function to use.
 .
.
If you select "Card reader" or "USB MIC", go to step 5.
If you select "Webcam for PC/Mac", go to step 7.
orto select the device to connect.  .
.
If you select "PC/Mac", go to step 7.
If you select "iOS/iPadOS", go to step 9.
orto select the power supply. .
.
 on the SETTINGS Screen.
The USB setting Screen will appear.
You can use a USB function by selecting the corresponding item.
To open the Recording Screen, pressor.

You can use the Q8n-4K as a web camera to output audio and video signals to a computer.

Web camera use is not possible with an iOS/iPadOS device.
If a timing difference occurs between the video and audio when using the recorder as a web camera, you can set an audio delay time so that it matches the timing of the video.
 .
.
 or
or to adjust the delay time.
Pressinglengthens the delay time by +10 ms and pressingshortens the delay time by -10 ms.
| Setting | Explanation |
|---|---|
| 0 ms | The delay time can be set in increments of 10 ms. The maximum delay time is 300 ms. |
| ↕ | |
| 300 ms |
The Q8n-4K can be used as a USB mic to input audio to a computer or iOS/iPadOS device.
The input sound can be monitored directly during web camera use or USB mic use.
 .
.Direct monitoring is turned ON/OFF.

The Q8n-4K can be used as a card reader to read and write data from computers and iOS/iPadOS devices.
.The SETTINGS Screen opens.
 on the SETTINGS Screen.
You can check the free space and size of microSD cards.
on the Recording Screen to open the SETTINGS Screen. to open the SD CARD Screen.
The SD card information will be shown.


Press any button to turn off the display.
on the Recording Screen to open the SETTINGS Screen.to open the SD CARD Screen. to start SD card formatting.
To cancel formatting, press.
When a dedicated wireless adapter (e.g. BTA-1) is connected, the Q8n-4K can be operated from an iOS/iPadOS/Android device using the dedicated Q8n Control app.
The Q8n Control app must be installed on the iOS/iPadOS/Android device in advance. The Q8n Control app can be downloaded from the App Store or Google Play.
For app setting and operation procedures, see the manual for the Q8n Control app.
 on the Recording Screen.
The SETTINGS Screen opens.
 on the SETTINGS Screen.
 on the Recording Screen.on the SETTINGS Screen.
Use an HDMI cable to connect with a TV / monitor to view the Q8n-4K video recordings on it.
You can play / stop the recorded video by using the remote control of the HDMI-CEC-compatible TV.

You can view Q8n-4K video recordings on a TV / monitor by using an HDMI cable.
If you connect an HDMI cable (commercially-available) to the Micro HDMI port , you can view Q8n-4K video recordings when the Recording Screen is open.

You can view Q8n-4K video recordings on a TV / monitor by using an HDMI cable.
to play back the video and audio. The recorded file will be played back on the TV / monitor screen.
During TV / monitor output, the unit can be operated with its own controls or the TV remote control.

Some TVs / monitors do not support some audio formats, so correct playback might not always be possible.
Since there is a risk of feedback when the Recording Screen is open, mute the audio output of the TV / monitor.
Only video files recorded with the Q8n-4K can be played back.
During HDMI connection, the beep is not output.
You can make various settings for the Q8n-4K on the SYSTEM Screen.
on the Recording Screen.The SETTINGS Screen opens.
on the SETTINGS Screen.The SYSTEM Screen opens.

You can make the following settings on the SYSTEM Screen.
| Button | Explanation |
|---|---|
| Return to the SETTINGS Screen. |
| "Beep" | Adjust the volume of the operation sound (beep). |
| "PhantomVoltage" | Change the phantom power voltage. |
| "Self Timer" | Set the self timer. |
| "Power Saving" | Set the display backlight time. |
| "AutoPowerOff" | Set the automatic power off function. |
 | Proceed to the next SYSTEM Screen. |
Presson the SYSTEM Screen to proceed to the next SYSTEM Screen.
You can make the following settings on the next SYSTEM Screen.

| Button | Explanation |
|---|---|
| Return to the SETTINGS Screen. |
| "Set Date" | Change the date and time. |
| "Setting Reset" | Reset the settings. |
| "Language" | Change the language. |
 | Return to the previous SYSTEM Screen. |
Set the volume of the Q8n-4K operation sound.
on the Recording Screen.The SETTINGS Screen opens.
on the SETTINGS Screen.The SYSTEM Screen opens.

| Setting | Explanation |
|---|---|
| No operation sound is output. | |
| A low-volume operation sound is output. | |
| A high-volume operation sound is output. |
twice.This reopens the Recording Screen.

Power can be saved by shortening the amount of time that the backlight stays lit.
on the Recording Screen.The SETTINGS Screen opens.
on the SETTINGS Screen.The SYSTEM Screen opens.

| Setting | Explanation |
|---|---|
| OFF | The backlight always stays bright. |
| 1 min | The backlight dims if no operation occurs for 1 minute. |
| 3 min | The backlight dims if no operation occurs for 3 minutes. |
| 5 min | The backlight dims if no operation occurs for 5 minutes. |
twice.This reopens the Recording Screen.
Set the unit to turn off automatically if not used at all for a set amount of time when running on battery power.
This function is disabled during recording and playback as well as when it is powered through its USB port.
on the Recording ScreenThe SETTINGS Screen opens.
on the SETTINGS Screen.The SYSTEM Screen opens.

| Settings | Explanation |
|---|---|
| OFF | The Auto Power Off function is disabled. |
| 1 min | The power will turn off automatically 1 minute after the last operation. |
| 3 min | The power will turn off automatically 3 minutes after the last operation. |
| 5 min | The power will turn off automatically 5 minutes after the last operation. |
twice.This reopens the Recording Screen.
If the date and time are set, you can add the recording date and time to files.
on the Recording Screen. The SETTINGS Screen opens.
on the SETTINGS Screen.The SYSTEM Screen opens.
.The next SYSTEM Screen opens.

The SET DATE Screen opens.
 to change the date and time. .
This reopens the SYSTEM Screen.
Set the language shown on the display.
on the Recording Screen. The SETTINGS Screen opens.
on the SETTINGS Screen.The SYSTEM Screen opens.
.The next SYSTEM Screen opens.
 twice.
This reopens the Recording Screen.

You can restore all Q8n-4K settings to their factory defaults.
on the Recording Screen. The SETTINGS Screen opens.
on the SETTINGS Screen.The SYSTEM Screen opens.
.The next SYSTEM Screen opens.
The reset confirmation screen opens.
 .
.
This starts resetting the Q8n-4K.
After resetting completes, the power will automatically turn off.
To cancel resetting, press.
The firmware versions used by the Q8n-4K can be checked.
on the Recording Screen. The SETTINGS Screen opens.
 on the SETTINGS Screen.
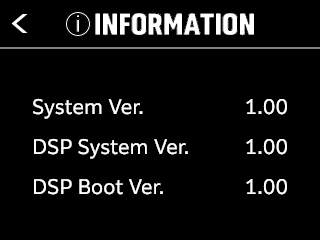
This shows the Q8n-4K firmware versions.
twiceThis reopens the Recording Screen.

The Q8n-4K firmware can be updated to the latest versions.
The latest firmware update file can be downloaded from the ZOOM website (zoomcorp.com).
Refer to Q8n-4K Firmware Update Guide on the Q8n-4K download page.
on the Recording Screen. The SETTINGS Screen opens.
 on the SETTINGS Screen.
The MIC CAPSULE Screen opens.

Information about the mic capsule is shown.


Press any button to close the information.
The Q8n-4K allows mic capsules to be switched for different circumstances.
When using optional mic capsules, there is basically no difference in the display and operation from when using the included mic capsule. However, you can change settings specific to each mic capsule.
The table below shows which mic capsules are compatible with the Q8n-4K.
| Mic capsule | Description | Compatible with the Q8n-4K | |
|---|---|---|---|
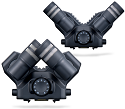 | XAH-8 | XY-AB stereo mic | ✔ |
 | VRH-8 | Ambisonic VR mic | ✔ |
 | EXH-8 | 4-channel XLR input | Not compatible |
 | XYH-6 | 90/120º angle-switchable XY stereo mic | ✔ |
 | XYH-5 | XY stereo mic with shock mount | ✔ |
 | MSH-6 | Mid-side stereo mic | ✔ |
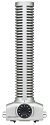
 | SSH-6 | Mid-side stereo shotgun mic | ✔ |
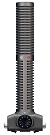
 | SGH-6 | Shotgun mic | ✔ |
 | EXH-6 | 2-channel XLR/TRS input | ✔ |
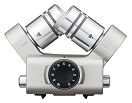
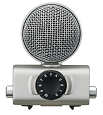
| The XAH-8 is a stereo mic capsule that can use two stereo formats ("XY" and "AB"). There is basically no difference in the display and operation from when using the included mic capsule. |
| The VRH-8 is an Ambisonic mic capsule that can capture 360º audio recordings with four mics to produce vertical spread and front-back depth. It supports three audio recording formats: AmbiX, FuMa and Ambisonics A. |
Available audio recording formats
- 48 kHz/24-bit
- 48 kHz/16-bit
- 44.1 kHz/24-bit
- 44.1 kHz/16-bit
Available recording modes
- MOV+WAV
- WAV(MULTI)
Audio channels that can be played back
- MIXED: audio of stereo mixdown selected during recording
- Ambix/FuMa/Ambisonics A: W channel audio (Omni)
The VRH-8's mic position is fixed at upright.
INPUT 1 and INPUT 2 jacks are disabled.
You can set the audio recording format to AmbiX, FuMa or Ambisonics A.
on the Recording Screen. The SETTINGS Screen opens.
 on the SETTINGS Screen.
The MIC CAPSULE Screen opens.
The audio recording format changes.

You can select a mixdown mode for stereo audio files when using the VRH-8.
| Mixdown mode | Explanation |
|---|---|
| 360º OMNI | This outputs a mono mix of sound from all directions. |
| 90º STEREO | This outputs stereo sound from the front 90º. |
on the Recording/Recording Standby Screen, Webcam Screen, or USB Mic Screen. The Mixer Screen opens.
 or .
or .Mixdown mode changes.

| The XYH-6 is an XY stereo mic capsule that allows you to set the angle between mics to 90º or 120º. The XYH-6 also has a MIC/LINE IN input jack (that supports plug-in power) to input sound from external devices. |
Make the following setting when a mic that supports plug-in power is connected to the MIC/LINE IN input jack of the mic capsule.
on the Recording Screen. The SETTINGS Screen opens.
on the SETTINGS Screen.The MIC CAPSULE Screen opens.
Plug-in Power is turned on and the mic is supplied with power.

| The XYH-5 is an XY stereo mic capsule equipped with a shockmount mechanism. The XYH-5 also has a MIC/LINE IN input jack (that supports plug-in power) to input sound from external devices. |
Make the following setting when a mic that supports plug-in power is connected to the MIC/LINE IN input jack of the mic capsule.
on the Recording Screen. The SETTINGS Screen opens.
on the SETTINGS Screen.The MIC CAPSULE Screen opens.
Plug-in Power is turned on and the mic is supplied with power.
| The MSH-6 is a mid-side stereo mic capsule with a forward-facing, unidirectional mic (mid) and a side-facing, bi-directional mic (side). You can change the stereo width freely by adjusting the MS side level. |
You can set the side level (stereo width) from 0º (mono) to 150º in 30º increments when using the MSH-6.
on the Recording Screen. The SETTINGS Screen opens.
on the SETTINGS Screen.The MIC CAPSULE Screen opens.
The MS side level changes.

| The SSH-6 is a mid-side stereo mic capsule that includes a super-directional shotgun mic (mid) for picking up sound from the center and a bidirectional mic (side) for picking up sounds from the left and right. You can change the stereo width freely by adjusting the side level. |
You can set the side level (stereo width) from 0º (mono) to 150º in 30º increments when using the SSH-6.
on the Recording Screen. The SETTINGS Screen opens.
on the SETTINGS Screen.The MIC CAPSULE Screen opens.
The MS side level changes.
| The SGH-6 is a mono shotgun mic capsule with a super-directional mic that suppress ambient noise and focuses on the desired sound. Mono audio is input to L/R MIC channels. There is basically no difference in the display and operation from when using the included mic capsule. |
| The EXH-6 is an XLR/TRS combo capsule that provides additional external inputs for two channels. Signals from dynamic mics, line-level instruments, mixers and portable music players, for example, can be input through it. |
When using the EXH-6, you can mix the inputs of its two channels to mono.
When Mono Mix is ON, a mono mix of the audio from both EXH-6 external inputs will be sent to both MIC L/R channels.
on the Recording Screen. The SETTINGS Screen opens.
on the SETTINGS Screen.The MIC CAPSULE Screen opens.
Mono Mix turns on.

Check the connections with connected output devices and their volume settings.
Confirm that the Q8n-4K volume is not set low.
If you are using a mic capsule, confirm that the input level settings are suitable and that it is oriented correctly. (→ Adjusting audio (setting input/output))
Check the input level settings. (→ Adjusting audio (setting input/output))
If another device is connected to an input jack, raise the output level of that device.
If a condenser mic is connected to an input jack, check the phantom power and phantom power voltage settings.(→ Using phantom power)
If using an input jack, confirm that PAD is set appropriately. (→ Using the PAD function)
Confirm that the button indicators for the channels to be recorded are lit red.
Confirm that the microSD card has open space. (→ Checking SD card information)
Confirm that a microSD card is loaded properly in the card slot. (→ Inserting microSD cards)
The unit and the microSD card might become warm but this is not a malfunction.
If the internal temperature becomes too high when using the Q8n-4K, a warning will sound and the power will turn off automatically. Wait for the temperature to decrease before using it again.
microSD cards can become worn out. Speed can decrease after repeated writing and erasing.
Formatting the card with the Q8n-4K might improve this. (→ Formatting SD cards)
If formatting a microSD card does not improve this, we recommend replacing the card. Please check the list of cards that have been confirmed to work on the ZOOM website (zoomcorp.com)
The battery will not charge while the power is on. (→ Recharging the battery)
Confirm that the USB cable being used supports data transfer.
Lower the input volume, set the PAD switch to -20 dB, or lower the output level of the external device.
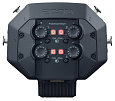
| Image sensor | 1/2.3" 16 M-pixel CMOS sensor | |
| Lens | F 2.8, 150° FOV | |
| Video format | MPEG-4 AVC/H.264 (MOV) | |
| Video resolutions | 4K/30, 25, 24 fps 1080/60, 50, 30, 25, 24 fps 720/60, 50, 30, 25, 24 fps | |
| Audio formats | WAV: 96 kHz/24-bit, 16-bit 48 kHz/24-bit, 16-bit 44.1 kHz/24-bit, 16-bit | |
| Audio functions | LoCut: Off / 80 Hz / 120 Hz / 160 Hz / 200 Hz / 240 Hz Fx: Off / Limiter / Compressor / Leveler / DeEsser / NoiseGate Level: −∞ dB – +10 dB Pan: L100 – Center – R100 Delay: 0 ms, 10 ms … 300 ms (only during web camera use) Direct Monitor: On/Off (only during web camera and USB mic use) | |
| Image functions | FOV | 5 steps |
| SCENE | AUTO / INDOOR / OUTDOOR / NIGHT / CONCERT LIGHT | |
| Self timer | OFF / 3 sec / 5 sec / 10 sec | |
| BRIGHT | LOW / NORMAL / HIGH | |
| Display | 2.0" full-color LCD 320 × 240 | |
| Audio inputs | MIC | XY Mic: XYQ-8 (120° XY stereo mic) Maximum sound pressure: 120 dBSPL Input gain: −∞ dB – 43 dB |
| INPUT 1/2 | Input connector: XLR Input gain (PAD OFF): −∞ dB – 55 dB Input impedance : 1.8 kΩ or more Maximum permissible input level: +26 dBu (PAD ON) Phantom power: +12 V / +24 V / +48 V Equivalent input noise: –120 dBu or less | |
| Output connectors | Combined line/headphone stereo mini jack HDMI micro Type D | |
| Built-in speaker | 300 mW 8 Ω mono speaker | |
| Recording media | microSD / microSDHC / microSDXC (512 GB maximum) | |
| USB | USB Type-C < WEBCAM > Class: UVC 1.0 + UAC 1.0 Formats: 720 p, 1080 p WVGA video 48 kHz/16-bit audio stereo output < CARD READER > Class: USB Mass Storage < USB MIC > Class: UAC 1.0, Format: 44.1 kHz/16-bit 2-input/2-output Note: card reader and USB mic functions support iOS/iPadOS devices Note: supports USB bus power operation Note: Use USB cable that supports data transfer. | |
| REMOTE | ZOOM BTA-1 or other dedicated wireless adapter | |
| Power | Lithium-ion battery: DC 4.2 V maximum voltage, DC 3.7 V nominal voltage, 1600 mAh capacity AC adapter (ZOOM AD-17): DC 5 V/1 A | |
| Recharging times | By USB 2.0 port: about 4 hours and 30 minutes By USB 3.0 port: about 3 hours Using ZOOM AD-17: about 3 hours | |
| Battery operation time | 4K/30: 1 hour and 20 minutes 1080/30: 2 hours and 30 minutes Note: Times when MOV mode, 48 kHz/24-bit, XYQ-8 connected, no XLR input, Power Saving enabled | |
| External dimensions | Main unit (mic arm lowered): 159 mm (D) × 68 mm (W) × 65 mm (H) Main unit (mic arm raised) : 134 mm (D) × 68 mm (W) × 135 mm (H) Mic: 45 mm (D) × 66 mm (W) × 51 mm (H) | |
| Weight | 367 g (including battery) | |